
How to safely remove ceramic coating from your car
How to safely remove ceramic coating from your car
TL;DR:
- Ceramic coatings are highly resistant and require careful, multi-step removal to avoid damage.
- Proper removal involves thorough cleaning, chemical decontamination, mechanical polishing, and inspections.
- Professional tools and expertise ensure effective removal and optimal surface preparation for new coatings.
A worn or failing ceramic coating does more than look bad. It can trap contaminants, create uneven surfaces, and prevent a new protective layer from bonding correctly. Many San Diego vehicle owners assume a strong car wash or a quality degreaser will strip the old coating right off. It won’t. Ceramic coatings are engineered to be chemically resistant, which is exactly what makes them so durable in the first place. That same durability is what makes removal a precise, multi-step process. This guide walks you through everything you need to know: the right tools, the correct order of steps, the mistakes that cause paint damage, and exactly when calling in a professional is the smarter move.
Table of Contents
- Understanding ceramic coating: What it is and why removal matters
- What you need: Tools, products, and preparation checklist
- How to remove ceramic coating: Step-by-step instructions
- Common mistakes and troubleshooting: Ensuring a flawless finish
- After removal: Prepping your paint for a new ceramic coating
- Our perspective: Why professional removal matters more than you think
Key Takeaways
| Point | Details |
|---|---|
| Proper removal is vital | Safely removing old ceramic coating prevents damage and ensures the best results for new protection. |
| Use the right tools | A dual-action polisher, paint-safe products, and careful surface prep are key for complete removal. |
| Avoid shortcuts | Improper removal can damage your car’s finish and shorten the lifespan of the next ceramic coating. |
| Professional help pays off | Expert detailers provide thorough, safe removal so your vehicle stays in top condition. |
Understanding ceramic coating: What it is and why removal matters
Ceramic coating is a liquid polymer that bonds chemically to your vehicle’s clear coat, forming a nano-layer (a microscopic protective film) that repels water, UV rays, and contaminants. When it’s working properly, the ceramic coating benefits are clear: intense gloss, hydrophobic water beading, and a surface that stays cleaner longer. But coatings don’t last forever. Most consumer-grade coatings last one to three years, while professional-grade products can last five or more with proper maintenance.
Over time, coatings can fail in several ways. UV exposure, harsh chemicals, improper washing techniques, or simply age can cause the coating to oxidize, crack, or delaminate. When that happens, you’re left with a surface that looks dull, feels rough, and no longer repels water effectively. Understanding the reasons ceramic coating fails helps you recognize when removal is necessary rather than optional.
Common myths about ceramic coating removal:
- Regular car shampoo will strip a ceramic coating. False. Coatings are designed to resist soap and water.
- A strong degreaser will dissolve the coating. False. Chemical resistance is a core feature of ceramic coatings.
- You can apply a new coating directly over a failing one. False. Bonding requires bare, clean paintwork.
- Removal always damages the paint. False. Done correctly, removal leaves the paint intact and ready for reapplication.
The risks of improper removal are real: clear coat damage, swirl marks, incomplete removal leading to poor reapplication, and in severe cases, paint that needs full correction before any new coating can be applied.
Important: Ceramic coating removal is not the same as paint correction. Removal strips the protective layer. Paint correction addresses scratches, swirls, and oxidation in the clear coat itself. You may need both, but they are separate steps.
When removal is necessary:
| Situation | Action needed |
|---|---|
| Coating is 3+ years old and failing | Full removal and reapplication |
| Visible water spots or swirls in coating | Remove, correct, reapply |
| Preparing for a new coating | Remove old layer completely |
| Coating applied incorrectly | Remove and start fresh |
| Coating delaminating or peeling | Immediate removal required |
The key takeaway here is that removal is a deliberate process, not something that happens by accident during a wash. Treating it as such protects your paint and ensures your next coating performs at its best.
What you need: Tools, products, and preparation checklist
With a clear sense of what’s at stake, let’s gather the right tools and prep for a safe removal. Skipping preparation is one of the most common reasons DIY removal goes wrong. Rushing into the polishing stage without a clean, assessed surface leads to swirl marks, uneven removal, and potential clear coat damage.
Tools and products you’ll need:
- pH-neutral car wash soap: For the initial wash. Avoid anything harsh.
- Iron remover and tar remover: Chemical decontaminants that lift embedded particles before mechanical work.
- Clay bar: Removes surface contaminants that chemical decontamination misses.
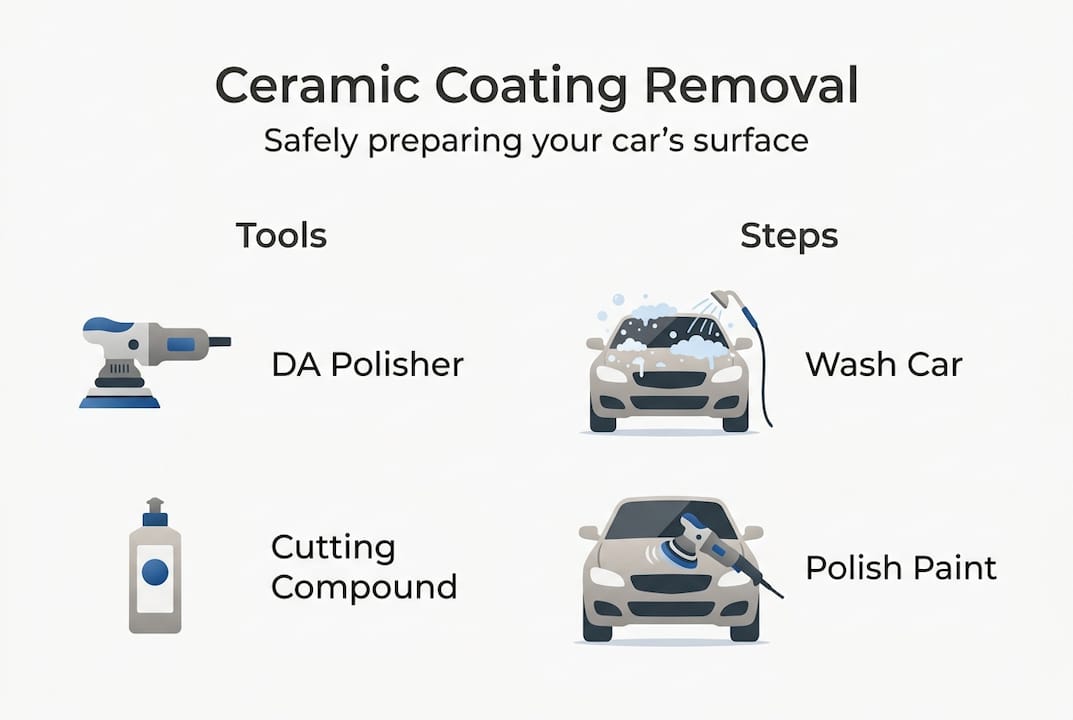
- Dual-action (DA) polisher: The primary tool for mechanical removal. Safer than a rotary polisher for most users.
- Cutting compound and cutting pads: To break down the ceramic layer.
- Finishing polish and finishing pads: To refine the surface after compound work.
- Microfiber towels: High-quality, lint-free towels for wiping and inspection.
- Paint thickness gauge: Measures clear coat depth to prevent over-polishing.
- Protective gloves and eye protection: Non-negotiable for chemical handling.
| Tool | Purpose |
|---|---|
| DA polisher | Mechanical removal of ceramic layer |
| Cutting compound | Breaks down hardened coating |
| Clay bar | Surface decontamination |
| Paint thickness gauge | Monitors clear coat health |
| Iron remover | Dissolves ferrous contamination |
| Microfiber towels | Residue removal and inspection |
Before you touch a polisher, wash the vehicle thoroughly and inspect the paint under bright light. Look for swirls, scratches, or areas where the coating is already lifting. This tells you where you’ll need more attention and where you need to be more careful.
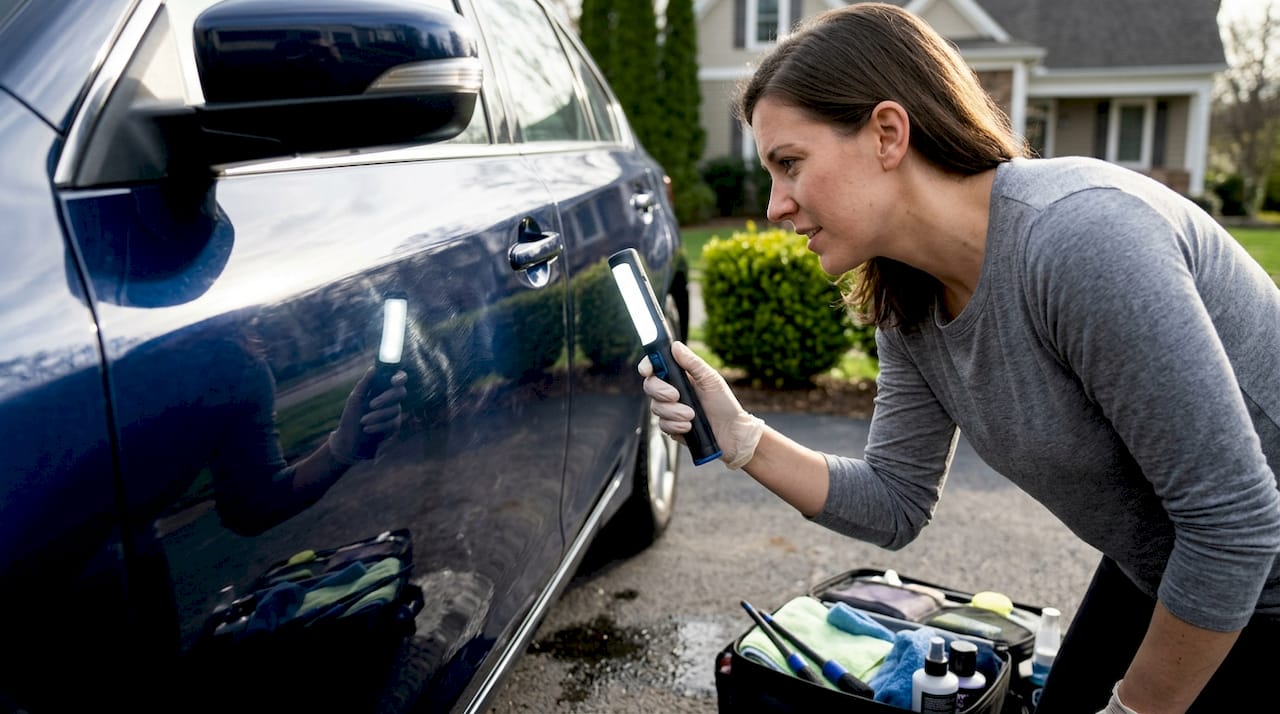
Pro Tip: Test your compound and polisher on a small, inconspicuous area first, such as the lower door jamb. This lets you calibrate your pressure and speed settings before working on visible panels. The professional prep tips used by trained detailers always include this step.
You should also check the ceramic coating products you’re working with, since some newer nano-ceramic formulas require specific cutting compounds to break down effectively. Using the wrong compound can mean hours of work with minimal results.
Pre-removal checklist:
- Vehicle is fully washed and dried
- Paint thickness gauge readings recorded for each panel
- Chemical decontamination complete
- Clay bar treatment done
- Work area is shaded and surface temperature is below 80°F
- All tools and products within reach
Working in direct San Diego sunlight on a hot panel is a fast way to create new problems. Heat causes compounds to dry too quickly, leaving residue that’s difficult to remove and can scratch the surface during wipe-off.
How to remove ceramic coating: Step-by-step instructions
Once prepared, you can safely follow a proven process for removing your old ceramic coating. The steps below apply to both DIY removal and professional-level work, though the products and equipment quality will differ.
Step-by-step removal process:
- Wash the vehicle thoroughly. Use pH-neutral soap and a two-bucket wash method. Remove all loose dirt and grime before any other step.
- Apply iron remover. Spray across painted surfaces and allow it to dwell for the recommended time. It will change color as it reacts with ferrous particles. Rinse completely.
- Apply tar remover if needed. Treat any areas with road tar or adhesive residue. Rinse and dry.
- Clay bar the entire vehicle. Use a clay lubricant and work in small sections. This removes embedded contamination the chemicals missed and preps the surface for polishing.
- Set up your DA polisher. Start with a cutting pad and a medium-cut compound. Set the speed to a moderate level (4 to 5 on most machines). Work in 2x2 foot sections.
- Polish each panel methodically. Apply light to moderate pressure. Make four to five slow passes across each section before moving on. Check your work frequently.
- Wipe off residue and inspect. Use a clean microfiber towel to remove compound residue. Check under bright light for remaining coating or swirls.
- Repeat with finer polish if needed. If the surface still shows coating remnants or micro-marring from the cutting compound, follow up with a finishing polish and soft pad.
- Final wipe-down and inspection. Wipe the entire vehicle with an IPA (isopropyl alcohol) solution diluted to 15 to 20 percent. This removes any remaining oils and reveals the true paint condition.
The paint correction process follows similar steps, but focuses on the clear coat itself rather than the coating layer above it. If you discover scratches or oxidation during removal, you may need to address those before reapplying.
Warning: Excessive machine polisher pressure or high speed settings can burn through the clear coat, especially on edges, curves, and thin paint areas. Always check your paint thickness gauge readings before and during the process. Improper removal risks include clear coat damage and swirl marks that require professional correction to fix.
Pro Tip: Let your paint cool to ambient temperature before starting. San Diego afternoons can push panel temperatures well above 100°F. Hot paint reacts unpredictably with compounds and can cause the product to flash too quickly, reducing effectiveness and increasing the risk of marring.
Signs that removal is complete include the loss of hydrophobic water beading, a surface that feels smooth and slightly raw rather than slick, and no visible coating separation under bright light. For more detail on restoring paint after removal, our blog covers the full post-removal care process.
Common mistakes and troubleshooting: Ensuring a flawless finish
Even with careful work, mistakes can happen. Here’s how to avoid them and achieve flawless results.
Most common DIY and professional mistakes:
- Skipping the clay bar stage and polishing over surface contamination
- Using a rotary polisher without experience, which generates excessive heat
- Not checking paint thickness before and during polishing
- Rushing through sections without inspecting between passes
- Using a cutting compound that’s too aggressive for the coating type
- Working in direct sunlight or on a warm surface
- Skipping the IPA wipe-down, leaving oil residue that affects new coating adhesion
The risks of incomplete removal extend beyond aesthetics. Incomplete removal leading to poor reapplication is one of the most common reasons new coatings fail within months rather than years. Most reapplication failures trace directly back to improper removal or inadequate surface prep.
Signs of incomplete removal vs. fully prepared paint:
| Surface condition | What it means |
|---|---|
| Water still beads strongly | Coating is still present |
| Surface feels slick or waxy | Residual coating or polish oils |
| Uneven gloss under bright light | Patchy removal, needs more work |
| Water sheets evenly, no beading | Coating fully removed |
| Surface feels slightly grippy | Paint is bare and ready |
| Consistent color and gloss | Properly prepped for reapplication |
If you notice swirl marks or haze after the process, a light finishing polish with a soft foam pad will usually resolve it. If you see deeper scratches or areas where the clear coat looks thin or discolored, stop immediately. That’s a sign of clear coat damage that needs professional attention before any new coating goes on.
For ongoing guidance on preventing coating issues, understanding what causes failures in the first place helps you avoid repeating the same problems. And if you’re weighing whether the investment makes sense, reviewing the ceramic coating ROI for San Diego drivers puts the cost and effort in clear perspective.
When to call a professional: If you see clear coat damage, if the coating is severely delaminated across large panels, or if you’ve attempted removal and still see uneven results, a trained detailer can assess and correct the situation without risking further damage.
After removal: Prepping your paint for a new ceramic coating
Once the old coating is gone, prepping your paint properly sets the stage for strong new protection. This stage is just as important as the removal itself. A clean, smooth, fully bare surface is the foundation for a coating that bonds correctly and lasts for years.
Post-removal preparation steps:
- Final wash with mild soap. Remove all compound residue and dust from the polishing process.
- Dry with a clean microfiber towel. Avoid air drying, which can leave water spots on bare paint.
- IPA wipe-down. A diluted IPA solution removes any remaining oils, waxes, or polish residue. This is a critical step that many DIYers skip.
- Surface inspection under bright light. Run your hand across each panel. The surface should feel smooth and slightly grippy, not slick. Look for any remaining streaks, haze, or uneven areas.
- Paint correction if needed. If micro-marring occurred during removal, a light polish with a finishing pad will restore clarity before coating.
- Final IPA wipe. One more pass ensures the surface is completely clean and ready for coating adhesion.
The professional application checklist used by trained detailers includes every one of these steps, and for good reason. Each one directly affects how well the new coating bonds and how long it lasts.
For San Diego drivers, the local environment adds another layer of consideration. Salt air from the coast, intense UV exposure, and warm temperatures year-round mean your new coating needs to be applied to a perfectly prepped surface to perform at its best. Reviewing the best options for coating available locally helps you choose a product suited to these specific conditions.
Reapplication readiness checklist:
- Paint is clean, dry, and free of all residue
- Surface passes the IPA wipe test (no oils or streaks visible)
- Paint thickness is within safe range on all panels
- Any micro-marring has been corrected
- Application environment is controlled: shaded, dust-free, temperature between 60°F and 80°F
For additional paint care advice on maintaining your vehicle between coatings, our blog covers everything from wash technique to seasonal protection strategies specific to San Diego.
Our perspective: Why professional removal matters more than you think
We’ve seen hundreds of vehicles come through our process, and the pattern is consistent. DIY removal attempts that go wrong almost never fail because of effort. They fail because of equipment limitations and the difficulty of assessing paint condition accurately without professional tools.
A paint thickness gauge tells you exactly how much clear coat you have to work with. Without one, you’re guessing. And in San Diego, where UV exposure accelerates clear coat thinning over time, that guess can mean the difference between a perfect surface and a panel that needs respray.
Our paint correction experts use professional-grade DA polishers, premium cutting compounds calibrated for specific coating types, and strict panel-by-panel inspection protocols. That level of consistency is genuinely difficult to replicate at home, even with quality consumer tools.
The coastal environment here also means that bare paint, once exposed during removal, is immediately vulnerable to salt air and UV. Speed and precision matter. Getting the new coating on quickly after removal, without compromising prep quality, is something professional detailers are set up to do efficiently.
Pro Tip: Avoid any product marketed as a
Recommended
- Why ceramic coating fails and how to prevent it: 5 key tips
- Is ceramic coating worth it in San Diego? Pros, cons & ROI
- Ceramic Coating San Diego | Professional Paint Protection
- San Diego Auto Detailing Blog | Ceramic Coating & Paint Care
- How To Apply Ceramic Coating: Step-by-step Guide For Car Owners