Common Auto Detailing Mistakes That Damage Your Car
Common Auto Detailing Mistakes That Damage Your Car
TL;DR:
- Many auto detailing mistakes stem from improper techniques, such as washing in sunlight and reusing dirty towels. These errors cause paint marring and damage that are preventable with correct tools, sequence, and understanding. Proper procedures like using two-bucket washing, protecting paint immediately after correction, and matching products to surfaces are essential for vehicle preservation.
The most common auto detailing mistakes are not product failures. They are technique failures: washing in direct sunlight, reusing dirty microfiber towels, applying dish soap to painted surfaces, and skipping protective coatings after paint correction. In the detailing industry, these errors fall under the broader category of paint marring and chemical misuse. Each one compounds over time, turning a vehicle that should look showroom-fresh into one covered in swirl marks, water spots, and faded trim. The good news is that every mistake on this list is preventable with the right process, the right tools, and a clear understanding of why sequence matters.
1. Common auto detailing mistakes that start with washing in direct sunlight
Washing your car in direct sunlight is one of the most damaging detailing pitfalls to avoid, and it is also one of the most common. When panels are hot and the sun is beating down, shampoo dries quickly, leaving behind mineral residue and water spots that require correction to remove. That means a routine wash can create work that demands a polish to fix.
The problem goes beyond aesthetics. Mineral deposits left by evaporated water can etch into clear coat over time, especially in a climate like San Diego’s where UV intensity is high year-round. Severindetailing’s guide on sun damage to car paint explains how heat accelerates this process significantly.
Always wash in a shaded area, early morning, or late afternoon. If shade is unavailable, work one panel at a time and rinse immediately before any product dries on the surface.
2. Using the wrong wash tools
Kitchen sponges and old bath cloths are two of the worst tools you can use on automotive paint. They trap dirt particles in their flat surface and drag those particles across the clear coat with every pass. The result is the same as using fine sandpaper on your paint at low pressure.
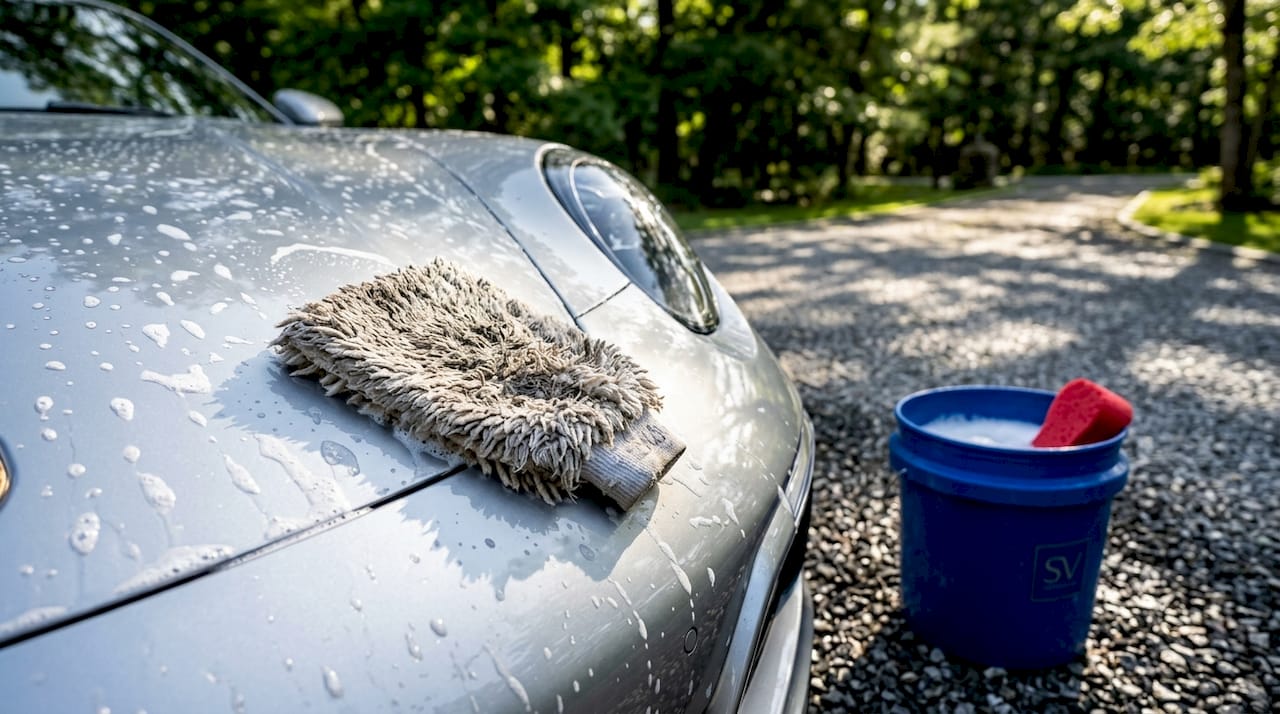
The correct tool is a dedicated wash mitt made from high-quality microfiber or lambswool. These materials lift dirt away from the surface rather than sliding it across. Pair your mitt with a two-bucket system and grit guards at the bottom of each bucket to keep contaminated water separated from your clean soapy water.
- Use a dedicated microfiber or lambswool wash mitt
- Never use kitchen sponges, old T-shirts, or bath towels on paint
- Replace wash mitts after signs of wear or heavy contamination
- Rinse your mitt in a separate rinse bucket before reloading with soap
Pro Tip: Inspect your wash mitt under bright light before every use. A mitt that looks clean can still carry embedded grit from a previous wash session.
3. The one-bucket washing method
The one-bucket method is one of the most widespread auto detailing errors among beginners. When you dip a contaminated mitt back into your soap bucket, you reintroduce road grit, brake dust, and dirt directly into the water you are about to apply to your paint. Every subsequent pass with that mitt grinds those contaminants into the clear coat.
The two-bucket method solves this completely. One bucket holds your car shampoo solution. The second holds clean rinse water. After each panel, you rinse the mitt in the clean bucket, wring it out, and reload it from the soap bucket. Grit guards placed at the bottom of each bucket trap settled debris so it cannot be picked up again.
This single change in technique eliminates a significant portion of wash-induced swirl marks. It costs nothing extra beyond a second bucket and two grit guards, which together run under $20.
4. Reusing contaminated microfiber towels
Reusing dirty microfiber towels is the primary cause of new swirl marks during and after washing. A microfiber towel used in a previous session and left unwashed carries embedded grit that scratches paint on contact. This is true even if the towel looks visually clean.
Wash all microfiber towels separately from household laundry, using a dedicated microfiber detergent. Never use fabric softener. Fabric softener coats the fibers and destroys their ability to lift and trap particles, turning a premium tool into a scratch-inducing cloth.
Maintain separate towels for different tasks: one set for washing, one for drying, one for applying product, and one for buffing. Cross-contamination between tasks is a frequent source of detailing mistakes beginners make without realizing it.
5. Air drying and using the wrong drying tools
Air drying your vehicle after a wash leaves behind mineral deposits and limescale spots that can etch into the clear coat. Water does not evaporate cleanly. It leaves behind whatever dissolved minerals it carried, and those deposits become increasingly difficult to remove the longer they sit.
Natural chamois leather is another drying tool that causes more harm than good. Traditional chamois drags surface grit across paint and reduces the effectiveness of any protective layer underneath. Modern plush automotive microfiber drying towels are the correct replacement. They hold significantly more water per square inch and release it without dragging.
- Never air dry a freshly washed vehicle
- Avoid natural chamois, bath towels, and paper towels on painted surfaces
- Use a large, plush automotive microfiber drying towel rated for paint contact
- Blot panels rather than wiping in long strokes to minimize friction
Pro Tip: Lightly mist each panel with a detail spray or quick detailer before wiping dry. This adds lubrication and prevents any remaining surface particles from scratching during the drying process.
6. Using dish soap and household detergents on paint
Dish soap strips wax and sealant protection in a single wash. It is formulated to cut through grease and food residue, which means it is aggressive enough to remove the protective layers you have applied to your paint. Dish soap also dries out rubber seals and plastic trim, accelerating their deterioration.
The damage from household detergents goes beyond stripping wax. Repeated use degrades the clear coat’s surface chemistry, making it more susceptible to UV damage and oxidation. A pH-neutral car shampoo designed for automotive finishes is the only correct product for washing painted surfaces.
Car-specific shampoos are formulated to clean effectively without stripping protection. Products from Chemical Guys, Meguiar’s, and Adam’s Polishes are widely available and designed specifically for this purpose. The cost difference between dish soap and a quality car shampoo is minimal. The cost difference in paint correction later is not.
7. Applying too much product
Overapplying wax, polish, or sealant does not increase protection. It creates streaking, uneven coverage, and product buildup that is difficult to remove. More product means more residue, and residue left on paint attracts dust and degrades the finish faster than a properly applied thin coat.
Manufacturer-recommended amounts exist for a reason. A pea-sized amount of polish on a 5-inch pad covers a 2-by-2-foot section effectively. A thin, even coat of wax applied with an applicator pad and buffed off before it fully hazes produces a cleaner, more durable result than a thick coat left to dry completely.
This mistake is particularly common with ceramic coating spray products. Applying too much in one pass causes high spots, which are areas of uneven coating that appear as streaks or smears under direct light and require correction to remove.
8. Cleaning wheels last instead of first
Cleaning your wheels after washing the body of your car is a sequencing error that transfers brake dust, iron particles, and wheel cleaner chemical fallout onto paint you have already cleaned. Wheel cleaners are often highly acidic or alkaline. When they drip or mist onto painted panels, they can cause chemical etching.
The correct sequence is wheels first, body second. Spray your wheel cleaner, let it dwell, agitate with a dedicated wheel brush, and rinse completely before touching the body panels. Use separate brushes and mitts for wheels and paint. Never share tools between the two surfaces.
This sequencing principle extends to the full detailing workflow. Decontamination with a clay bar or iron remover comes before polishing. Polishing comes before sealant or wax. Wax or sealant comes before interior work. Skipping or reversing steps in this sequence creates problems that require additional correction.
9. Interior product misuse on modern surfaces
Ammonia-based glass cleaners and high-concentration isopropyl alcohol degrade the oleophobic coating on modern touchscreens. That coating is what prevents fingerprints from sticking and makes the screen easy to wipe clean. Once it is gone, it cannot be restored without professional treatment.
The same principle applies to vinyl, leather, and rubber surfaces. Using a product formulated for one material on another causes discoloration, drying, or surface breakdown. An all-purpose cleaner diluted at a ratio appropriate for carpet will damage leather if applied at the same concentration.
- Use a dedicated screen cleaner with near-neutral pH for touchscreens and instrument clusters
- Apply leather conditioner only to genuine or synthetic leather, not vinyl
- Use a UV protectant on all interior plastics and vinyl to prevent fading and cracking
- Never scrub aggressively on any interior surface. Gentle passes with a soft brush or microfiber lift stains without embedding them deeper
Severindetailing’s interior detailing service uses material-matched products for every surface type, which is the standard that DIY detailing should aim to replicate.
10. Skipping protection immediately after paint correction
Leaving paint bare after correction is one of the most costly mistakes in the detailing process. Freshly corrected clear coat is more porous and reactive than protected paint. Water spots can etch into it within hours of exposure. Environmental contaminants bond to it faster. Without a sealant or wax applied immediately after polishing, the correction work begins degrading the same day it is completed.
The workflow for paint correction and protection must be treated as a single continuous process, not two separate tasks. Polish the panel, wipe the residue with a clean microfiber, and apply your chosen protection within the same session. Do not leave corrected paint exposed overnight.
| Step | Common mistake | Correct approach |
|---|---|---|
| Paint correction | Stopping after polishing | Apply sealant or wax immediately after |
| Pad selection | Using one pad for all stages | Match pad cut to compound aggressiveness |
| Towel reuse | Wiping with used microfibers | Use fresh, laundered towels for each panel |
| Lighting | Working without inspection light | Use a detailing light to check for haze |
Pro Tip: After correction, wipe the panel with an isopropyl alcohol panel wipe at 70% concentration to remove polish oils before applying sealant. This step dramatically improves bonding and durability of the protection layer.
For a detailed breakdown of the correction process, Severindetailing’s guide on paint correction in San Diego covers each stage with specific product and technique recommendations.
11. Washing with circular motions instead of straight passes
Circular washing motions create circular swirl marks, which are the most visible and hardest to correct type of paint marring. When you scrub in circles, any grit caught under the mitt follows that circular path across the clear coat, leaving arcing scratches that catch light from every angle.
Straight, overlapping passes from front to back or top to bottom keep any potential scratches linear and far less visible. This technique, combined with proper tool selection and the two-bucket method, reduces wash-induced marring to near zero. The Severindetailing guide on safe exterior washing details this technique alongside pressure and product recommendations specific to San Diego’s environment.
Key takeaways
Avoiding common auto detailing mistakes requires correct tools, proper sequencing, and material-matched products applied in the right amounts every time.
| Point | Details |
|---|---|
| Wash in shade, not sunlight | Hot panels cause shampoo to dry fast, leaving water spots that require correction. |
| Use the two-bucket method | Separating rinse and soap water prevents reintroducing grit to paint on every pass. |
| Never use dish soap on paint | Dish soap strips wax and sealant in one wash and accelerates clear coat deterioration. |
| Protect paint immediately after correction | Bare corrected clear coat etches quickly. Apply sealant or wax in the same session. |
| Match products to surface materials | Interior cleaners, especially on touchscreens and leather, must be formulated for the specific material. |
What I have learned after years of watching these mistakes repeat
The most consistent pattern I see is that paint damage comes from controllable basics, not from exotic failures. People spend money on premium waxes and ceramic spray coatings, then apply them in direct sunlight with a bath towel. The product cannot overcome the technique.
The detail that surprises most car owners is how much damage comes from drying, not washing. A perfect two-bucket wash followed by air drying still produces water spots and mineral deposits. The drying step is where a lot of otherwise careful owners lose their results.
I also think the interior is consistently underestimated. Most people know not to use dish soap on paint, but they will spray an ammonia-based glass cleaner directly onto a touchscreen without a second thought. Touchscreen oleophobic coatings are fragile and once degraded, the screen becomes a fingerprint magnet that no cleaning product will fix properly. A dedicated screen cleaner costs the same as a bottle of window spray and protects a component that costs hundreds to replace.
My honest recommendation is to master the basics before adding products or steps. Shade washing, clean tools, straight passes, immediate protection after correction. These four habits eliminate the majority of detailing damage I see on vehicles that come to us for paint correction. The products matter far less than the process.
— Dylan
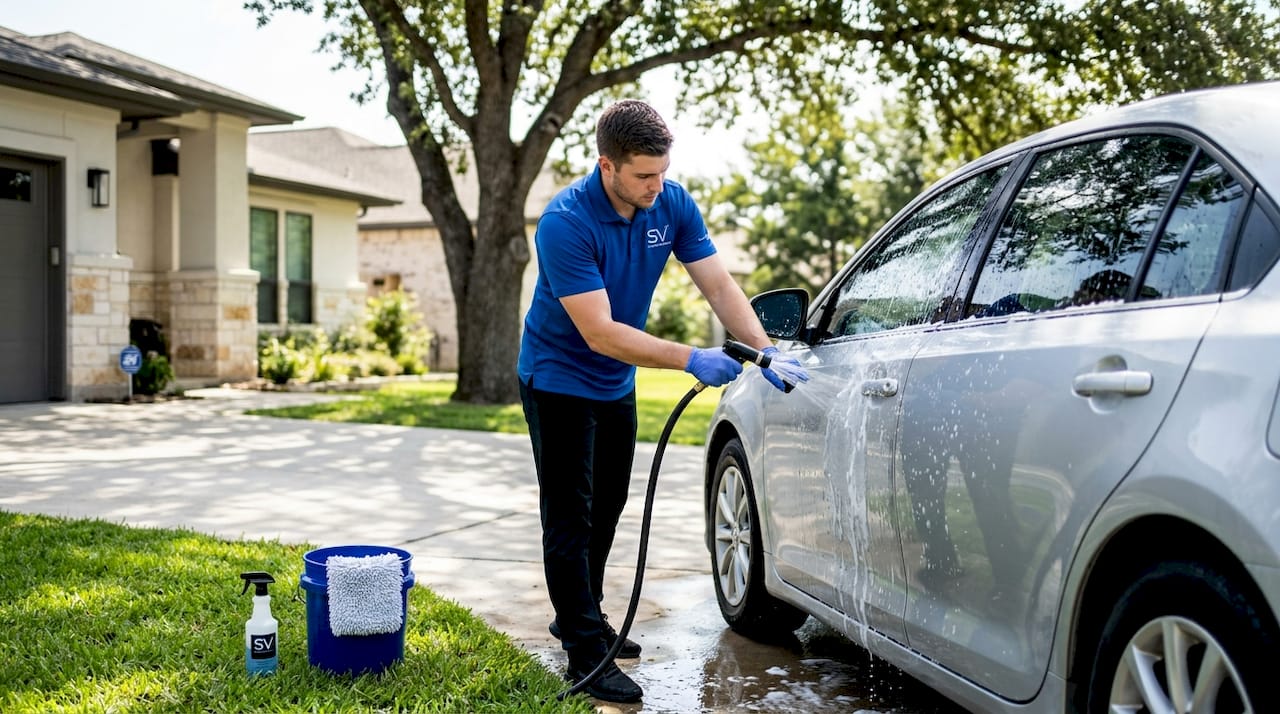
Protect your vehicle with professional mobile detailing in San Diego

If you want the results of a meticulous detail without the risk of DIY errors, Severindetailing brings professional-grade service directly to your home or office across San Diego County. Every service uses material-matched products, dedicated microfiber tools, and a sequenced workflow that prevents the mistakes covered in this article. From full mobile detailing packages covering interior and exterior to professional paint correction and ceramic coating for durable, long-lasting protection, Severindetailing handles every step with precision. Ready to protect your vehicle’s finish? Book your detail online and receive a prompt confirmation for a time that works for you.
FAQ
What causes swirl marks on car paint?
Swirl marks are caused by reusing contaminated wash mitts, wiping dry panels without lubrication, and using circular washing motions. The two-bucket method with grit guards and straight washing passes eliminates most wash-induced swirl marks.
Can I use dish soap to wash my car?
Dish soap removes wax and sealant protection in a single wash and dries out rubber seals and trim. Use a pH-neutral car shampoo formulated for automotive finishes instead.
How soon should I apply wax or sealant after paint correction?
Protection should be applied in the same session as correction. Freshly corrected clear coat is vulnerable to water spots and environmental etching within hours of exposure.
What should I use to clean my car’s touchscreen?
Use a dedicated screen cleaner with near-neutral pH. Ammonia and high-concentration isopropyl alcohol degrade the oleophobic coating on modern touchscreens, making them harder to clean over time.
Is air drying safe after washing my car?
Air drying leaves mineral deposits and limescale spots that can etch into clear coat. Always dry with a plush automotive microfiber drying towel, using a blotting motion rather than long wiping strokes.